|
Academy G-1 - G-4 Model Kits Review
|


|
Hi all,
I received the Academy Model G-1 - G-4 Gatchaman kits the other day and thought I'd post a quick review of them. I was going to hold off and watch for a better price, but the urge to get them here got the better of me. I ended up purchasing on Gmarket again. With some credit from a previous shipping overcharge plus a coupon, I ended up getting a set of the models shipped to me for a little over $21.
They arrived in perfect condition, and I was glad to finally see them. They were originally due out in December around the time of the God Phoenix model, but I found out from some model/hobby sites in Korea that they got delayed for a month.
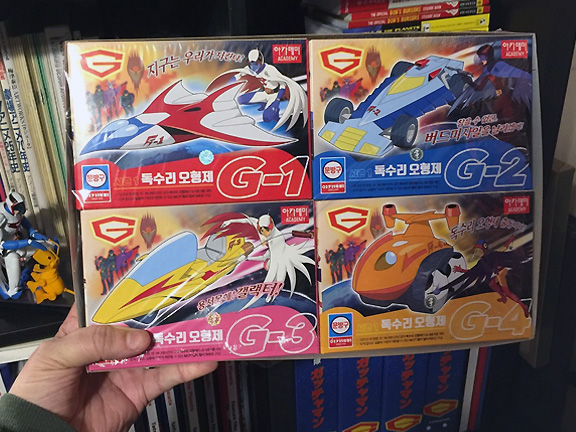
Finally in hand!
The models are shrink-wrapped into their tray. Although there wasn't a bit of extra space available for them to accidentally fall out. It took some careful trying before I could finally wriggle one of the boxes loose. Once done, the rest came out easily.
The tray is about 13" x 9" x 2" in size. Each individual kit box is about 6.5" x 4.5" x 2." The tray's outer edges feature full-color images on a nice, slick coated surface. The individual model box exteriors are the same. Inside the tray are a couple paper inserts on modeling tips/supply suggestions and a warning to check the contents before opening the sprue tree bags. Each is printed in Korean and English. An additional insert on safety precautions is printed in multiple languages.
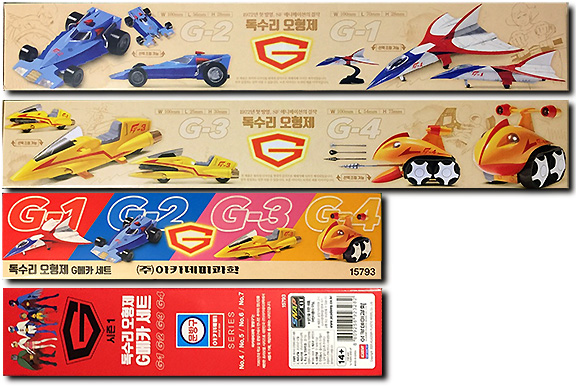
The tray edges
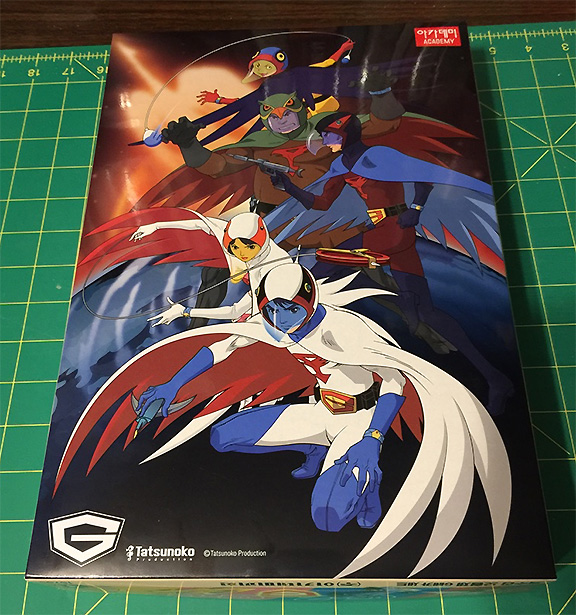
The tray back
I won't go into super detail about each kit. I'll just give general impressions on them all and only call things out when they're important to a specific model.
Each full-color box has an attractive front. The lower side has production and disclaimer information. The left side has a picture of the character, vehicle and printed specs for the vehicle. The right side has information on the kit - in these cases, which number it is in the Gatchaman model series, with convenient highlighting in color of the Ninja Team member and their vehicle. The top of the box shoes photos of the character in or on the vehicle from a model sheet drawing, and the painted model in its "Normal Mode" and "Attack Mode" building options.
The back each box includes building instructions. The pictures are easy to follow, but aside from the sprue letter/number call-outs, the instructions are in Korean only. So take care to follow the pictures. I did notice a number of mistakes in the sprue letter/number call-outs. However, there are a very limited number of parts for each kit, so it isn't a large problem. It's just a little surprising given how simple they are.
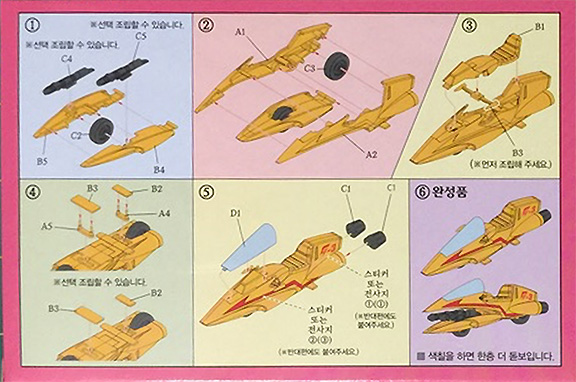
Example of the instructions for the G-3 kit
The kits are rated for ages 14 and up. They are snap-together. Unlike the God Phoenix, it actually says that on one side of the tray in English. There are a few points where a drop or two of glue will come in handy, and I'll detail them below. Each kit is molded in three colors - its main body color, black and clear. So if you want them to better match their look in the series, paint is required. I did not see any detailed lists of suggested paint colors, unless they're in Korean that I simply can't read. A sheet of decals and stickers is included with each. That way the builder can apply the one they're most comfortable with.
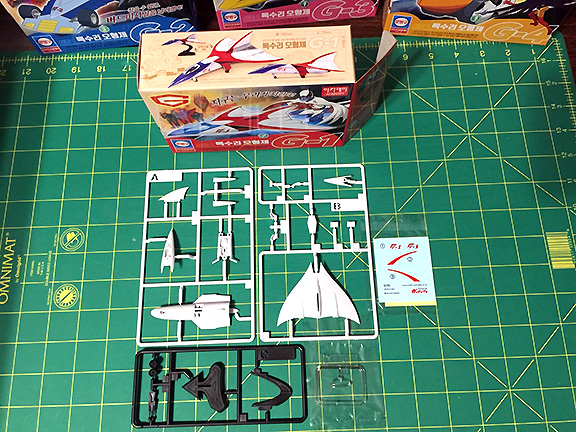
The G-1, its sprue trees and pack of decals/stickers
I found that the sprue runner parts are much more forgiving on these kits than on the God Phoenix. There is no need to shave the extra plastic off each and every part. Some benefit from it, but you can probably tell which by dry-fitting before assembly.
Be very careful when clipping small parts from the sprue. It might be best to keep a finger or two on certain parts as you clip it so they don't go flying. I almost lost two pieces during cutting and I was wary of the problem and trying to be careful.
The kits are non-scaled. Meaning they're not all in the same proportions with one another. The G-1 should be much larger compared to the others, for instance. Of the four, the G-2 and G-3 appear to be the closest in scale with one another.
Most of them are very easy to build. However, the G-3 may try one's patience. I had a number of problems with that one, including: The cannon parts were difficult to attach before, or after, assembling the body part they join into. If you put them in before, they pop off when you push the body parts together. Then if you try to put them in place afterward, it's nearly impossible to get them to snap into place. I finally solved it by assembling the body pieces, then getting the cannon parts close, then carefully pushing them home with a flat, plastic burnishing tool.
Getting the handlebar/body assembly to snap into place without having the handlebars dislodge partway through was nearly impossible. I finally had to put the body piece mostly into place and jiggle the handlebars into the correct spot. If they come out while it's assembled... forget it. You'll probably have to take it all apart and start again.
The bottom extendable ski struts are nearly impossible to snap into place. It took me a while and I had to *carefully* use an X-ACTO blade point to hold them down, while I pushed with the edge of my burnishing tool.
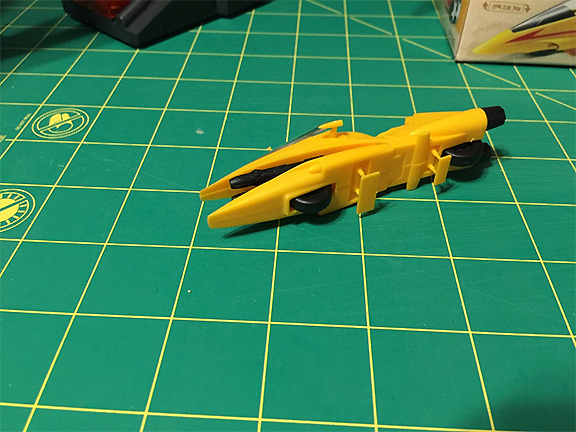
The bottom of the G-3, showing the problematic extended arms and ski parts
Where glue will be your friend:
G-2
- The little "air scoop" piece at the top, just behind the windscreen. There's no way that will stay in place for long if it isn't glued down.
G-3
- The two cannon parts should be glued into place before assembling the halves of the body, but *only* if you want to keep them there. They're part of the optional Normal/Attack mode setup, so the choice is yours.
- The clear windscreen snaps into place with one tab at the front. There is nothing holding it against the body on its back edge. At least with mine, once in place, the windscreen edges stick up.
- The handlebars would benefit greatly by being glued into place before trying to assemble them with the body.
- The two flat skis at the bottom of the extendable struts are just looking for places to fall off and get lost.
G-4
- The top of the main body doesn't stay together real well.
As with the God Phoenix there are a few sharp points to watch out for. Mainly on the G-1 and G-3. But since there isn't a lot of force involved in putting them together, most should be fine.
Most can of the kits be easily switched between Normal and Attack modes, but not the G-2. The G-2 will have to be a choice unless you want to swap out tires, light covers and more to make the switch.
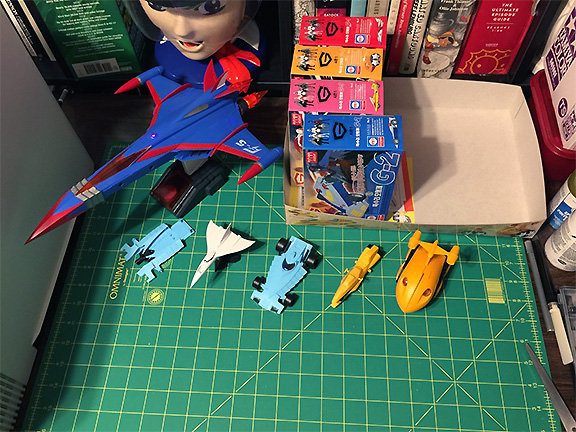
The God Phoenix with all four vehicles for size comparisons
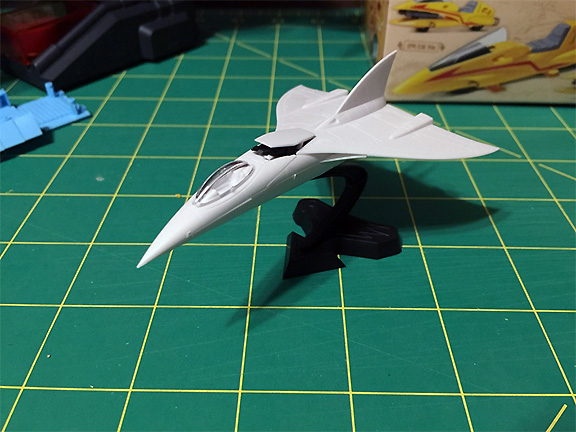
The built G-1, with no paint or decals/stickers, in "Attack Mode"
Overall these are pretty nice. With a little paint and a few spots of glue, I think they'll be great! I wish they were a little larger, especially the G-1, but for about $5 each, I'm not complaining too much. The detail is pretty nice and fairly faithful to the original series. Which makes me wonder why they didn't try "Newtro" designs with these too?
Again, if anyone has any questions or wants to see more pictures (I have included many more photos in the post about this set on my board) please let me know!
The Other Jason
www.battleoftheplanets.info
www.battleoftheplanets.info/cnc
This post has been edited 1 time(s), it was last edited by The Other Jason on 23-01-2021 at 00:04.
|


